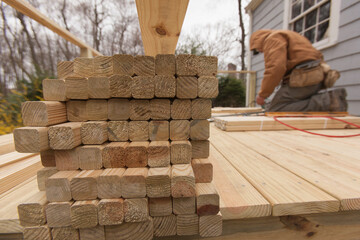
A well-maintained deck is more than just an outdoor extension of your home—it is a space for relaxation, entertaining guests, and enjoying the beauty of the outdoors. Over time, however, exposure to sun, rain, wind, and constant use can cause even the sturdiest deck to show signs of wear. Cracked boards, loose railings, faded finishes, and structural issues can make a once-inviting deck unsafe and unappealing. That is where timely deck repair becomes essential.
Why Deck Repair Matters
Ignoring minor deck problems often leads to more serious and costly issues later. For example, a small crack in a board may seem insignificant, but moisture can seep in, causing wood rot and compromising the strength of the structure. Loose nails or screws may create hazards, while unstable railings increase the risk of accidents. By scheduling regular inspections and repairs, homeowners protect their investment, extend the lifespan of their deck, and ensure a safe outdoor environment for family and friends.
Common Deck Problems That Require Repair
Decks endure significant wear and tear throughout the year. Here are some of the most common issues that indicate it’s time for deck repair:
- Wood rot – Moisture is the biggest enemy of wooden decks. Rotting boards not only weaken the structure but also spread quickly if not replaced.
- Loose or broken boards – Foot traffic, weather exposure, and shifting foundations can cause boards to crack, warp, or come loose.
- Wobbly railings – A secure railing is critical for safety. Loose railings often result from weakened posts or corroded fasteners.
- Faded or peeling finish – Ultraviolet rays and rain can strip the protective sealant, leaving the deck vulnerable to damage.
- Insect damage – Pests such as termites and carpenter ants can silently weaken deck boards and framing.
- Structural instability – Over time, joists, beams, and support posts can weaken, making the entire deck unsafe.
Addressing these issues promptly through professional deck repair ensures durability, safety, and aesthetic appeal.
The Benefits of Timely Deck Repair
Investing in deck repair provides multiple long-term benefits:
- Safety – Eliminating hazards like splintering boards or loose steps reduces the risk of injury.
- Extended lifespan – Regular repair and maintenance prevent small issues from developing into costly replacements.
- Improved appearance – Restoring faded surfaces and replacing damaged boards enhances the overall look of the outdoor area.
- Increased property value – A well-maintained deck boosts curb appeal and adds value to the home.
- Cost savings – Early intervention minimizes the need for expensive full deck replacement.
Deck Repair vs. Deck Replacement
One of the most common questions homeowners face is whether to repair or replace a deck. The answer depends on the extent of the damage.
- Repair is ideal when the majority of the structure is sound, and only surface-level issues like cracked boards, loose nails, or fading finishes need attention.
- Replacement may be necessary when the underlying support system is compromised, widespread rot is present, or safety is at risk.
A professional assessment helps determine the best option, ensuring homeowners make the most cost-effective decision.
The Deck Repair Process
Professional deck repair typically involves a step-by-step approach:
- Inspection – Identifying damaged boards, railings, and structural components.
- Board replacement – Removing rotted or cracked boards and replacing them with new, sturdy materials.
- Fastener tightening – Securing nails, screws, and bolts to stabilize the deck.
- Railing repair – Reinforcing or replacing weak railings to restore safety.
- Surface treatment – Power washing, sanding, and sealing to protect against future weather damage.
- Structural reinforcement – Strengthening joists, posts, and beams when necessary.
This comprehensive process restores both the beauty and functionality of the deck, giving homeowners a safe and attractive space to enjoy.
Preventive Maintenance for Deck Longevity
While deck repair is often unavoidable, preventive care can significantly extend the life of an outdoor deck. Some best practices include:
- Regular cleaning – Sweeping away debris and washing the surface prevents mold and mildew buildup.
- Annual inspections – Checking for signs of wear helps catch small issues early.
- Sealing and staining – Applying a protective finish every few years shields the deck from sun and water damage.
- Prompt repairs – Addressing cracks, loose boards, and minor issues right away prevents bigger problems.
- Proper drainage – Ensuring water does not pool around the deck reduces the risk of rot.
Consistent maintenance keeps a deck strong, beautiful, and safe for many years.
Choosing Professional Deck Repair Services
While minor repairs can sometimes be handled by homeowners, many deck issues require professional expertise. A skilled deck repair specialist has the tools, knowledge, and experience to address safety concerns and restore the deck properly. When choosing a professional, look for:
- Experience and skill in working with different deck materials.
- Thorough inspection services to identify hidden problems.
- Attention to safety in repairing and reinforcing structural components.
- Quality finishing techniques such as sealing, staining, and painting.
Hiring a professional ensures repairs are done correctly, safely, and with long-lasting results.
Decks provide a welcoming outdoor retreat, but without proper care, they can quickly deteriorate. From replacing worn boards to reinforcing support structures, deck repair plays a vital role in maintaining safety, beauty, and functionality. Homeowners who invest in timely repairs not only protect their property but also create a safe and inviting space for years of enjoyment.
By prioritizing deck maintenance and repair, outdoor living spaces remain strong, attractive, and ready for every gathering, quiet evening, or family memory that unfolds upon them.